前言
配置好OCR后,截图数字是固定坐标截取的,坐标是我自己量的,但是这也让我一直耿耿于怀,一是不方便后期全分辨率化,二是我在测试过程中偶尔会有截图不是数字的问题.所以还得想办法用图形的方法计算数字的坐标.
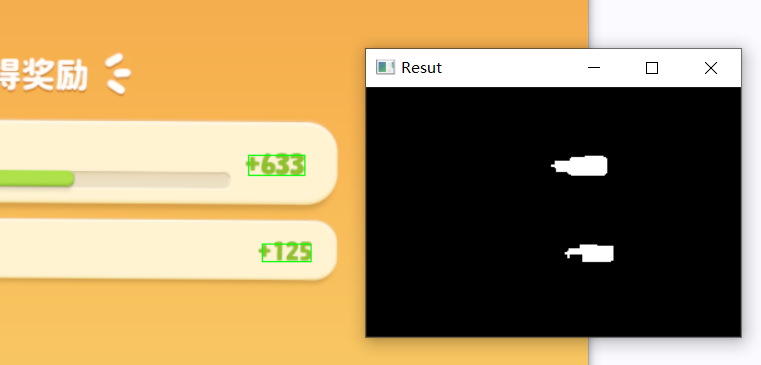
下面我将讲解我的方法,这里先讲大致思路:图片裁剪->颜色分离保留数字->形态学操作->轮廓检测->转换为方框坐标
处理问题
观察图片,可以注意到背景大都是橙色,数字和小部分是绿色,于是给了我基本的思路-颜色分离
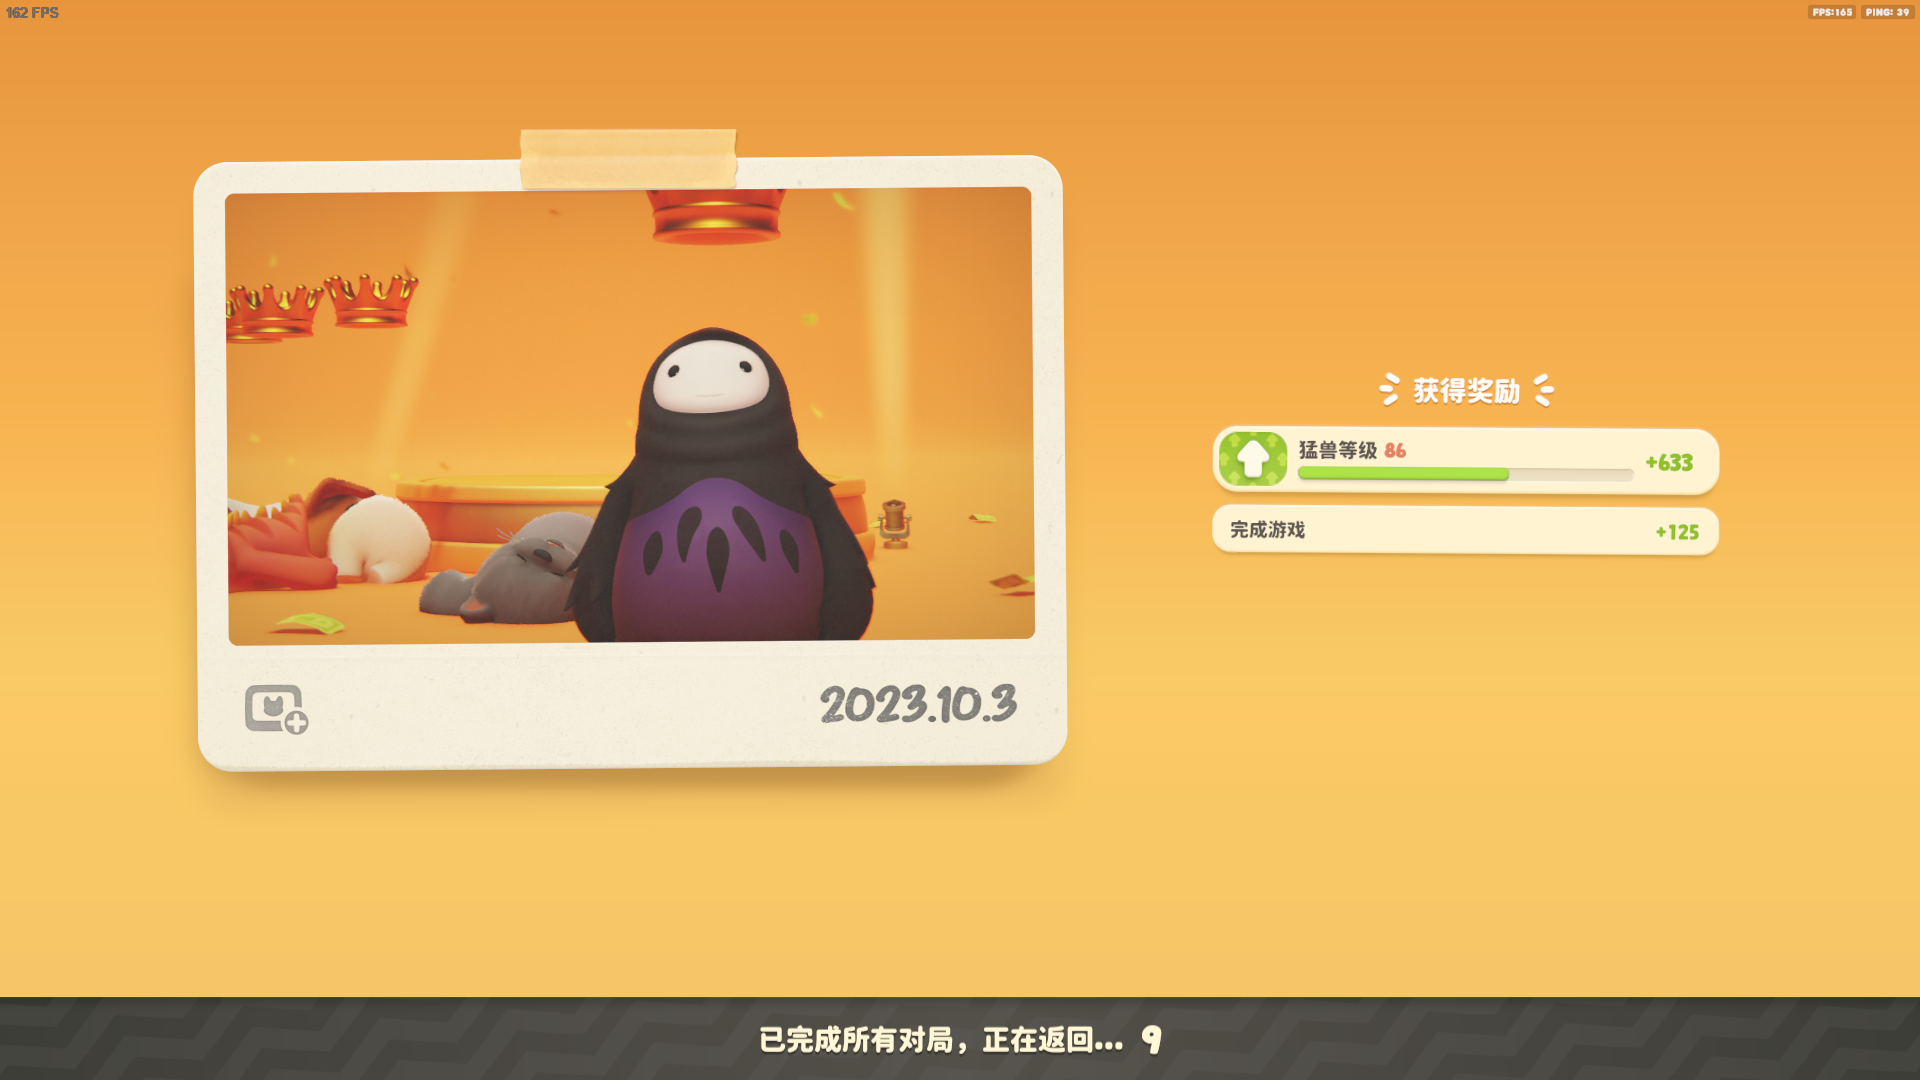
使用cv2的inRange算法可以很方便地处理,吸取数字的颜色,确定好高低阈值就可以,需要注意cv2都是BGR不是RGB,阈值确定方法我是将数字的颜色(144,192,42)每一个都上下调一点,然后cv2.imshow看效果再微调,你可以看到我的上下阈值相差不多,是我精调过的
img = cv2.imread('./testrecources/js3.png')
lower_color = np.array([42,180,140])
upper_color = np.array([45, 200, 150])
mask = cv2.inRange(img,lower_color,upper_color)
效果如下
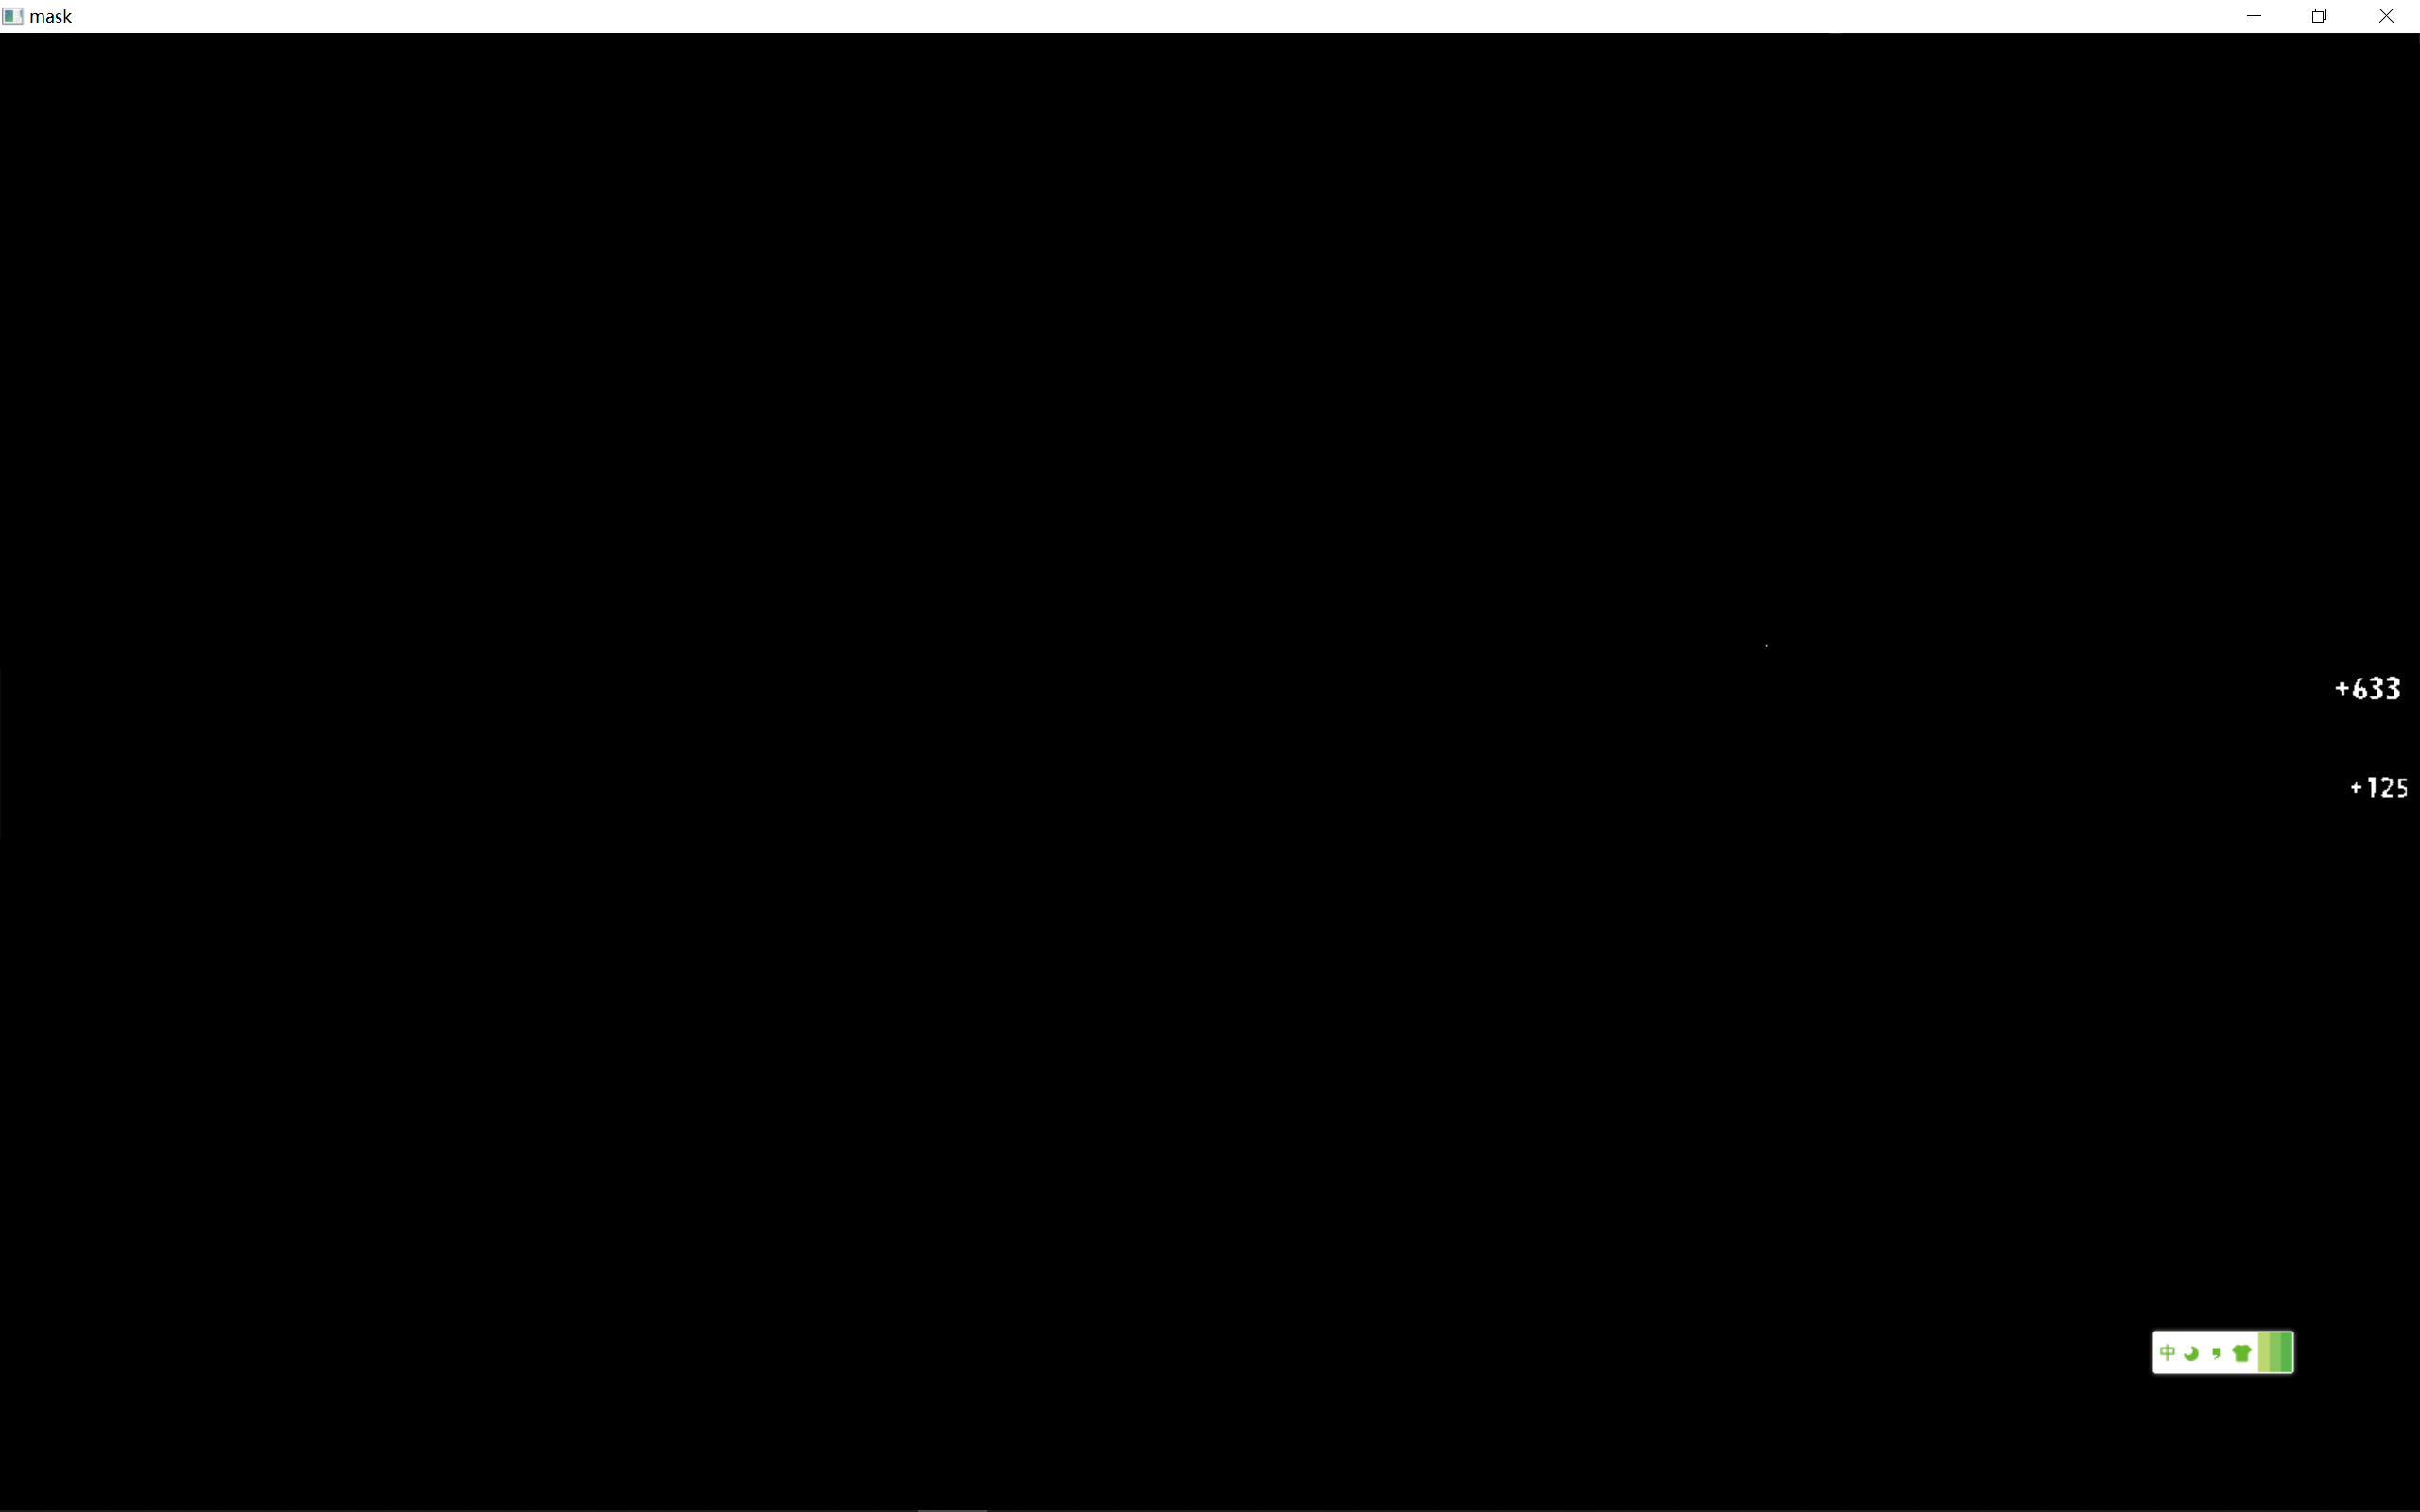
可以看到数字和背景很完整的都被分离了出来.
但有时候背景复杂很多情况还会有很多地方被保留了下来,但是我们虽然不用一个坐标来确定数字,但是我们可以确定一个大概的范围就可以了
x, y, w, h =1500, 400, 300, 200
img_silm = img[y:y+h, x:x+w]
mask = cv2.inRange(img_silm,lower_color,upper_color)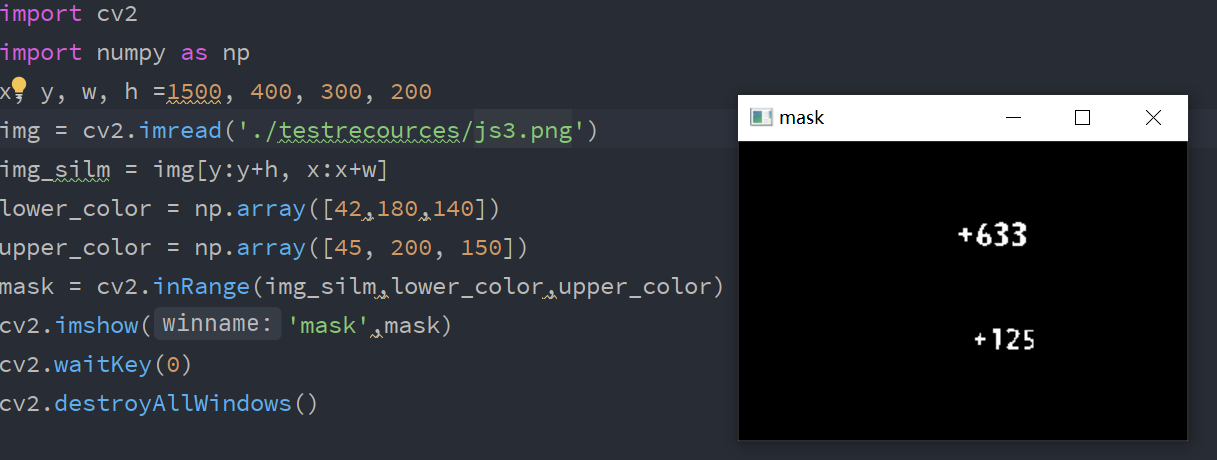
接来下检测轮廓
contours, _ = cv2.findContours(mask, cv2.RETR_EXTERNAL, cv2.CHAIN_APPROX_SIMPLE, )
for contour in contours:#在原图画方框和圆心
   x,y,w,h = cv2.boundingRect(contour)
   cv2.rectangle(img_silm,(x,y),(x+w,y+h),(0,255,0),1)
   cv2.circle(img_silm,(x+w//2,y+h//2),5,(0,0,255),-1)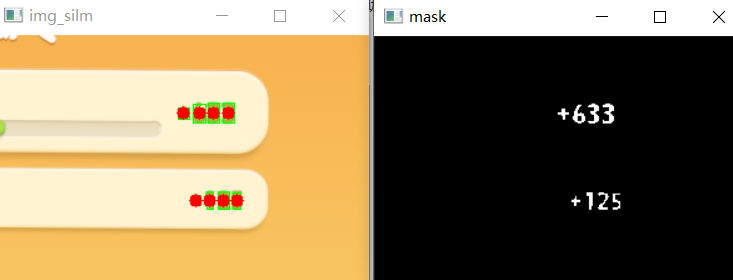
这时候我们可以看到,它每个数字检测了一个轮廓,导致现在有八个轮廓,而我们需要的是一个大的方框可以把整个数字包含在内,这时候我们就需要形态学处理了,这里代码我不多讲了,因为我也仅限于用的阶段,推荐大家搜索形态学处理来具体了解
kernel = np.ones((10, 10), np.uint8)
mask = cv2.morphologyEx(mask, cv2.MORPH_CLOSE, kernel)#腐蚀膨胀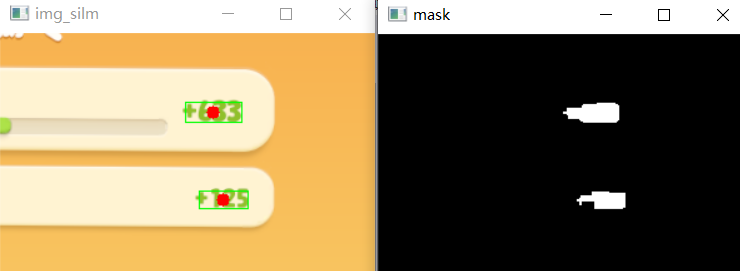
经过处理后我们的数字就模糊到一团了,于是这样我们就得到了每一串数字的轮廓.
有了轮廓信息,就是对轮廓处理然后返回坐标啦,下面我直接贴算法的全部代码
import cv2
import numpy as np
tolerancex,tolerancey = 20,20
explocation = {
"room": (1500, 400, 300, 200),
"quickgame": (1500, 200, 300, 200),
}
def getAllExp(bounding_rects):
sorted_arr = bounding_rects[bounding_rects[:, 1].argsort()]
return sorted_arr[0]
# 加载图像
def getExpimg(path,model):
image_path = cv2.imread(path)
if model == 'room':
region_x, region_y, region_w, region_h = explocation["room"]
else:
region_x, region_y, region_w, region_h = explocation["quickgame"]
image = image_path[region_y:region_y+region_h, region_x:region_x+region_w]
lower_color = np.array([42,180,140])
upper_color = np.array([45, 200, 150])
mask = cv2.inRange(image, lower_color, upper_color)
# 形态学操作
kernel = np.ones((10, 10), np.uint8)
mask = cv2.morphologyEx(mask, cv2.MORPH_CLOSE, kernel)
# 查找轮廓
contours, _ = cv2.findContours(mask, cv2.RETR_EXTERNAL, cv2.CHAIN_APPROX_SIMPLE,)
# 处理每个轮廓
bounding_rects = []
for contour in contours:
x, y, w, h = cv2.boundingRect(contour)
bounding_rects.append([x+region_x,y+region_y,w,h])
bounding_rects = np.array(bounding_rects)
result = getAllExp(bounding_rects)
rectangle_x,rectangle_y,rectangle_w,rectangle_h = result[0]-tolerancex,result[1]-tolerancey,result[2]+tolerancex+10,result[3]+tolerancey+10
exp_pic = image_path[rectangle_y:rectangle_y+rectangle_h,rectangle_x:rectangle_x+rectangle_w]
cv2.imwrite('./imgs/exp.png',exp_pic)
getExpimg('./testrecources/expjs.png','room')


Comments | NOTHING